How to Build Your Application
1. Open the Call Editor and select the Application Editor section.
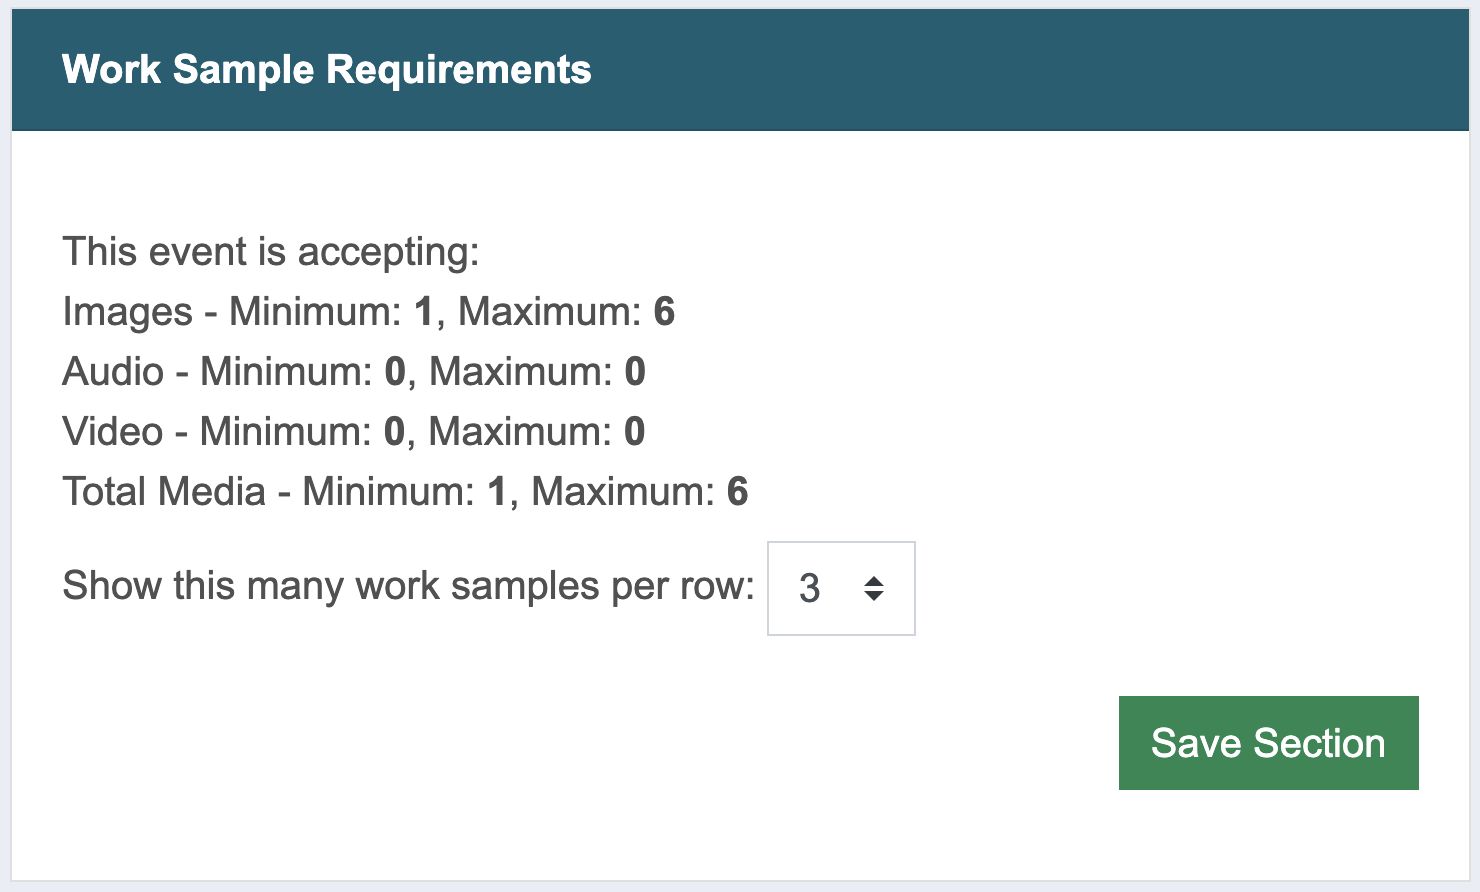
2. Verify that the Work Sample Requirements are correct.
Your work sample requirements indicate the number of images, audio samples, and video samples that applicants may submit.
To change these requirements, contact the CaFÉ team before you publish your call.
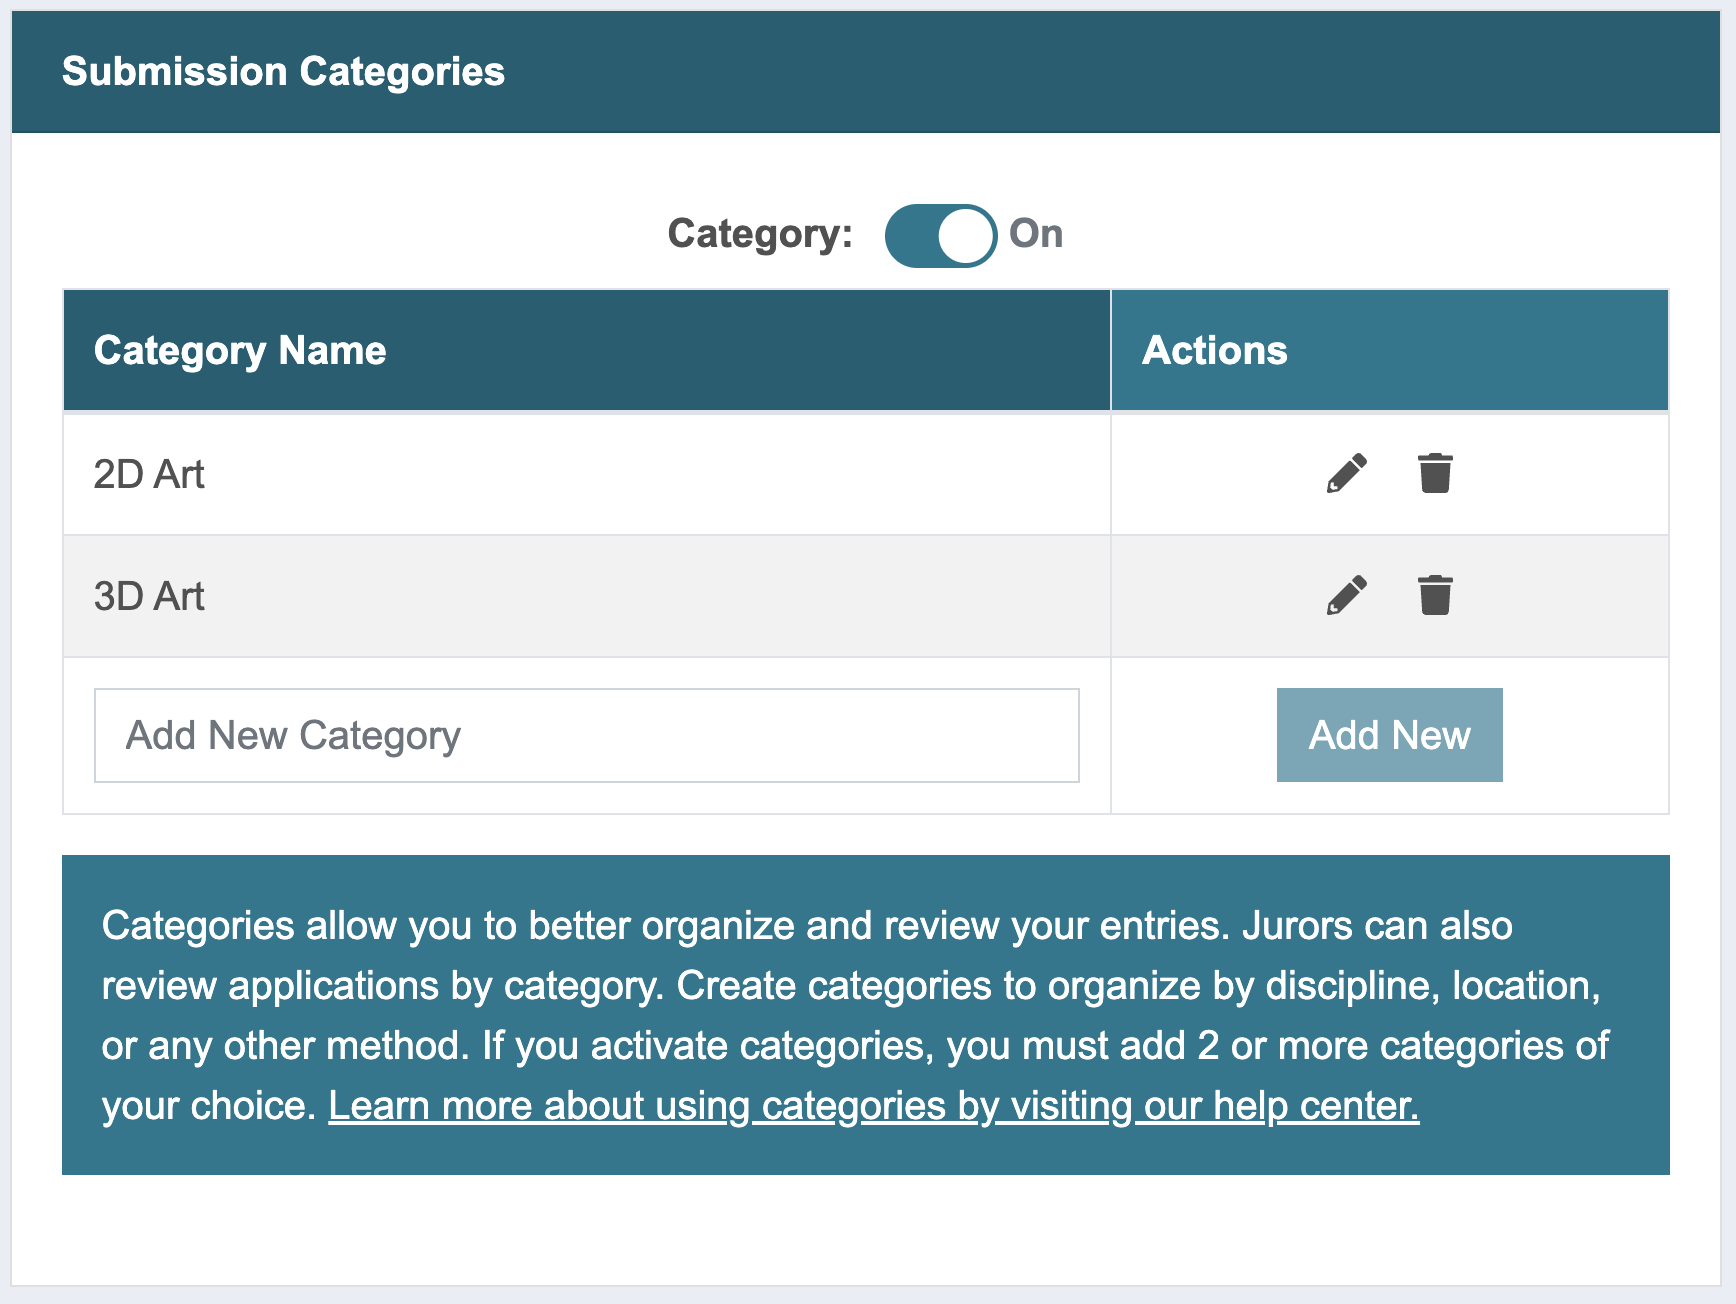
3. Set up Submission Categories, if you need them.
Applicants will select their category from the list of options you create. Jurors will be able to view and score by category.
To activate, toggle the Category setting to On.
Enter the category name in the empty field and click Add New.
Repeat to add at least two categories.
Click the pencil icon ✏️ to edit an existing category. Click the save icon to save changes.
To remove a category, click the trash icon.
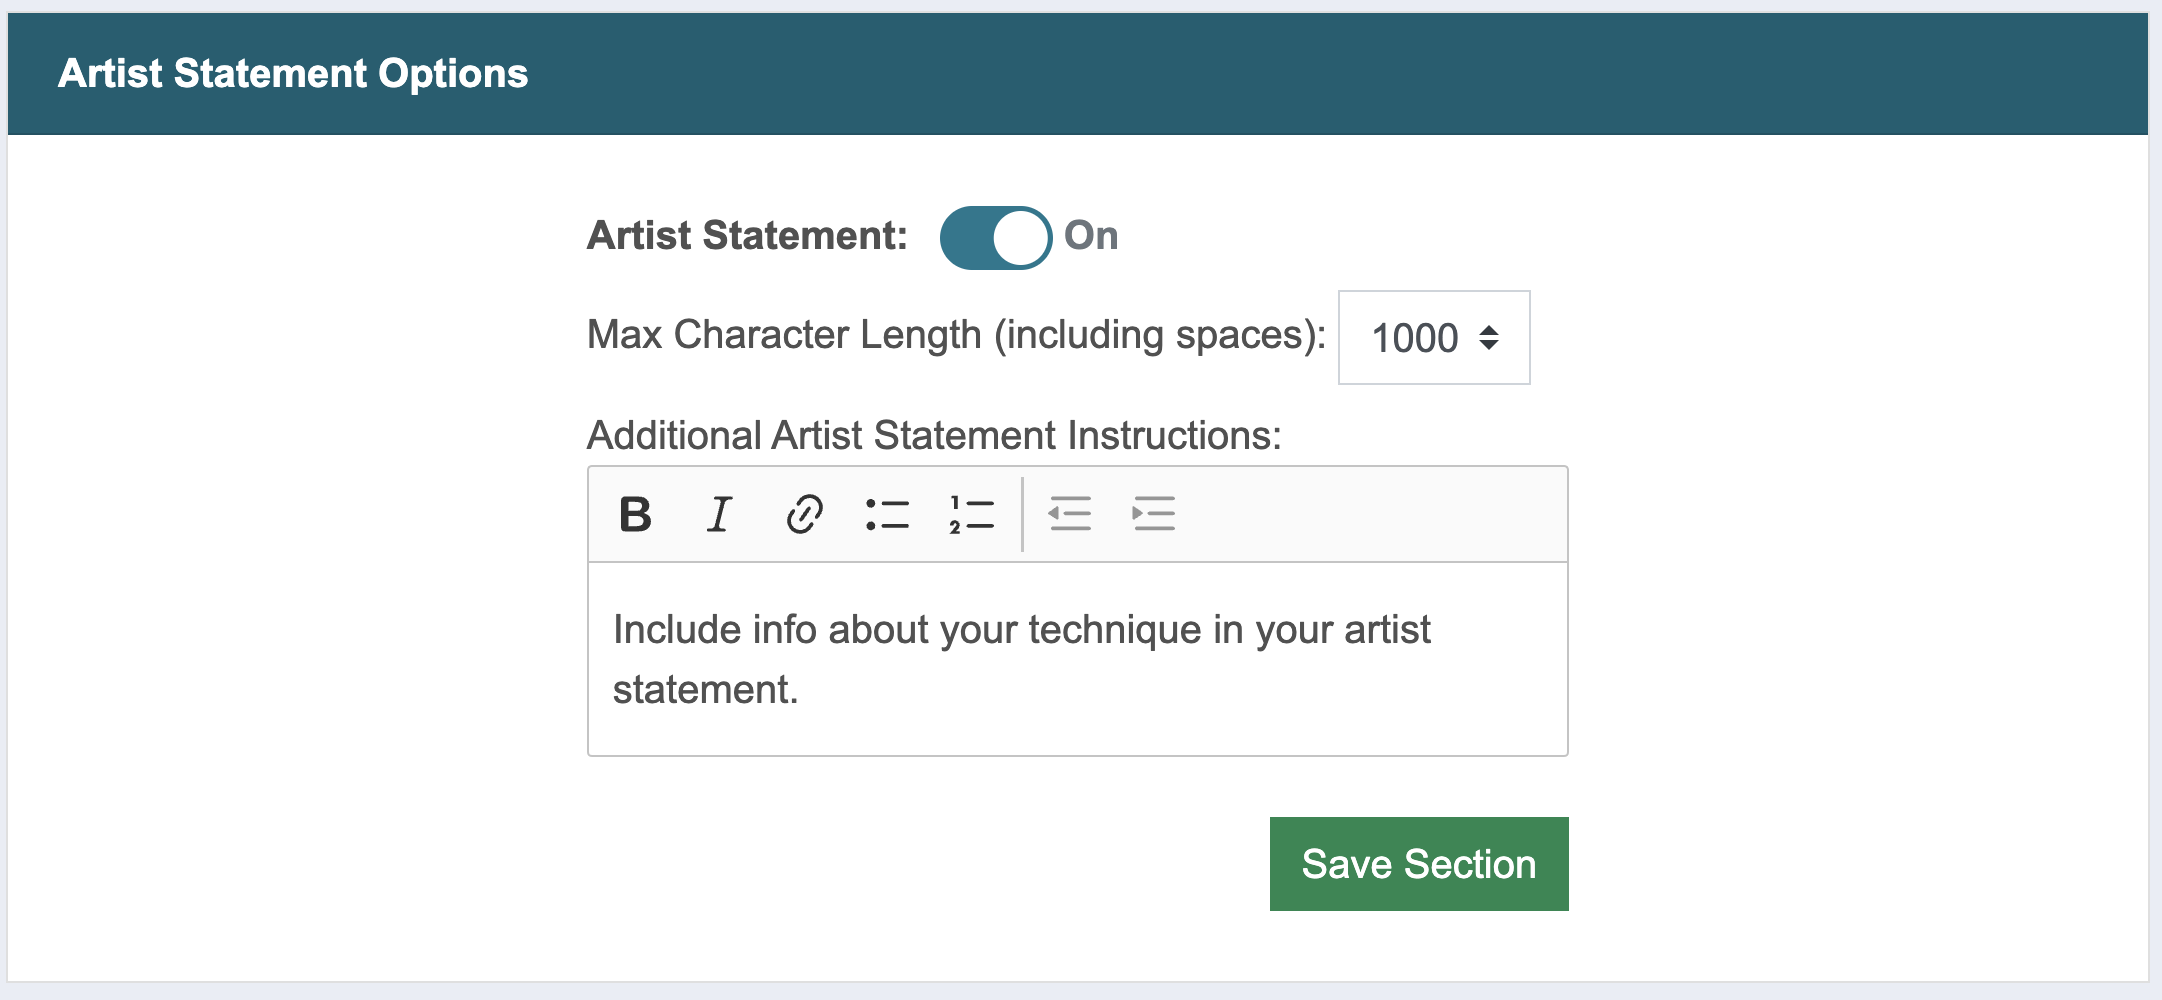
4. Choose your Artist Statement Options.
To collect artist statements, toggle the Artist Statement setting to On.
Choose a Max Character Length (1,000-5,000).
If applicable, enter Additional Artist Statement Instructions.
If you are not collecting artist statements, toggle the Artist Statement setting to Off.
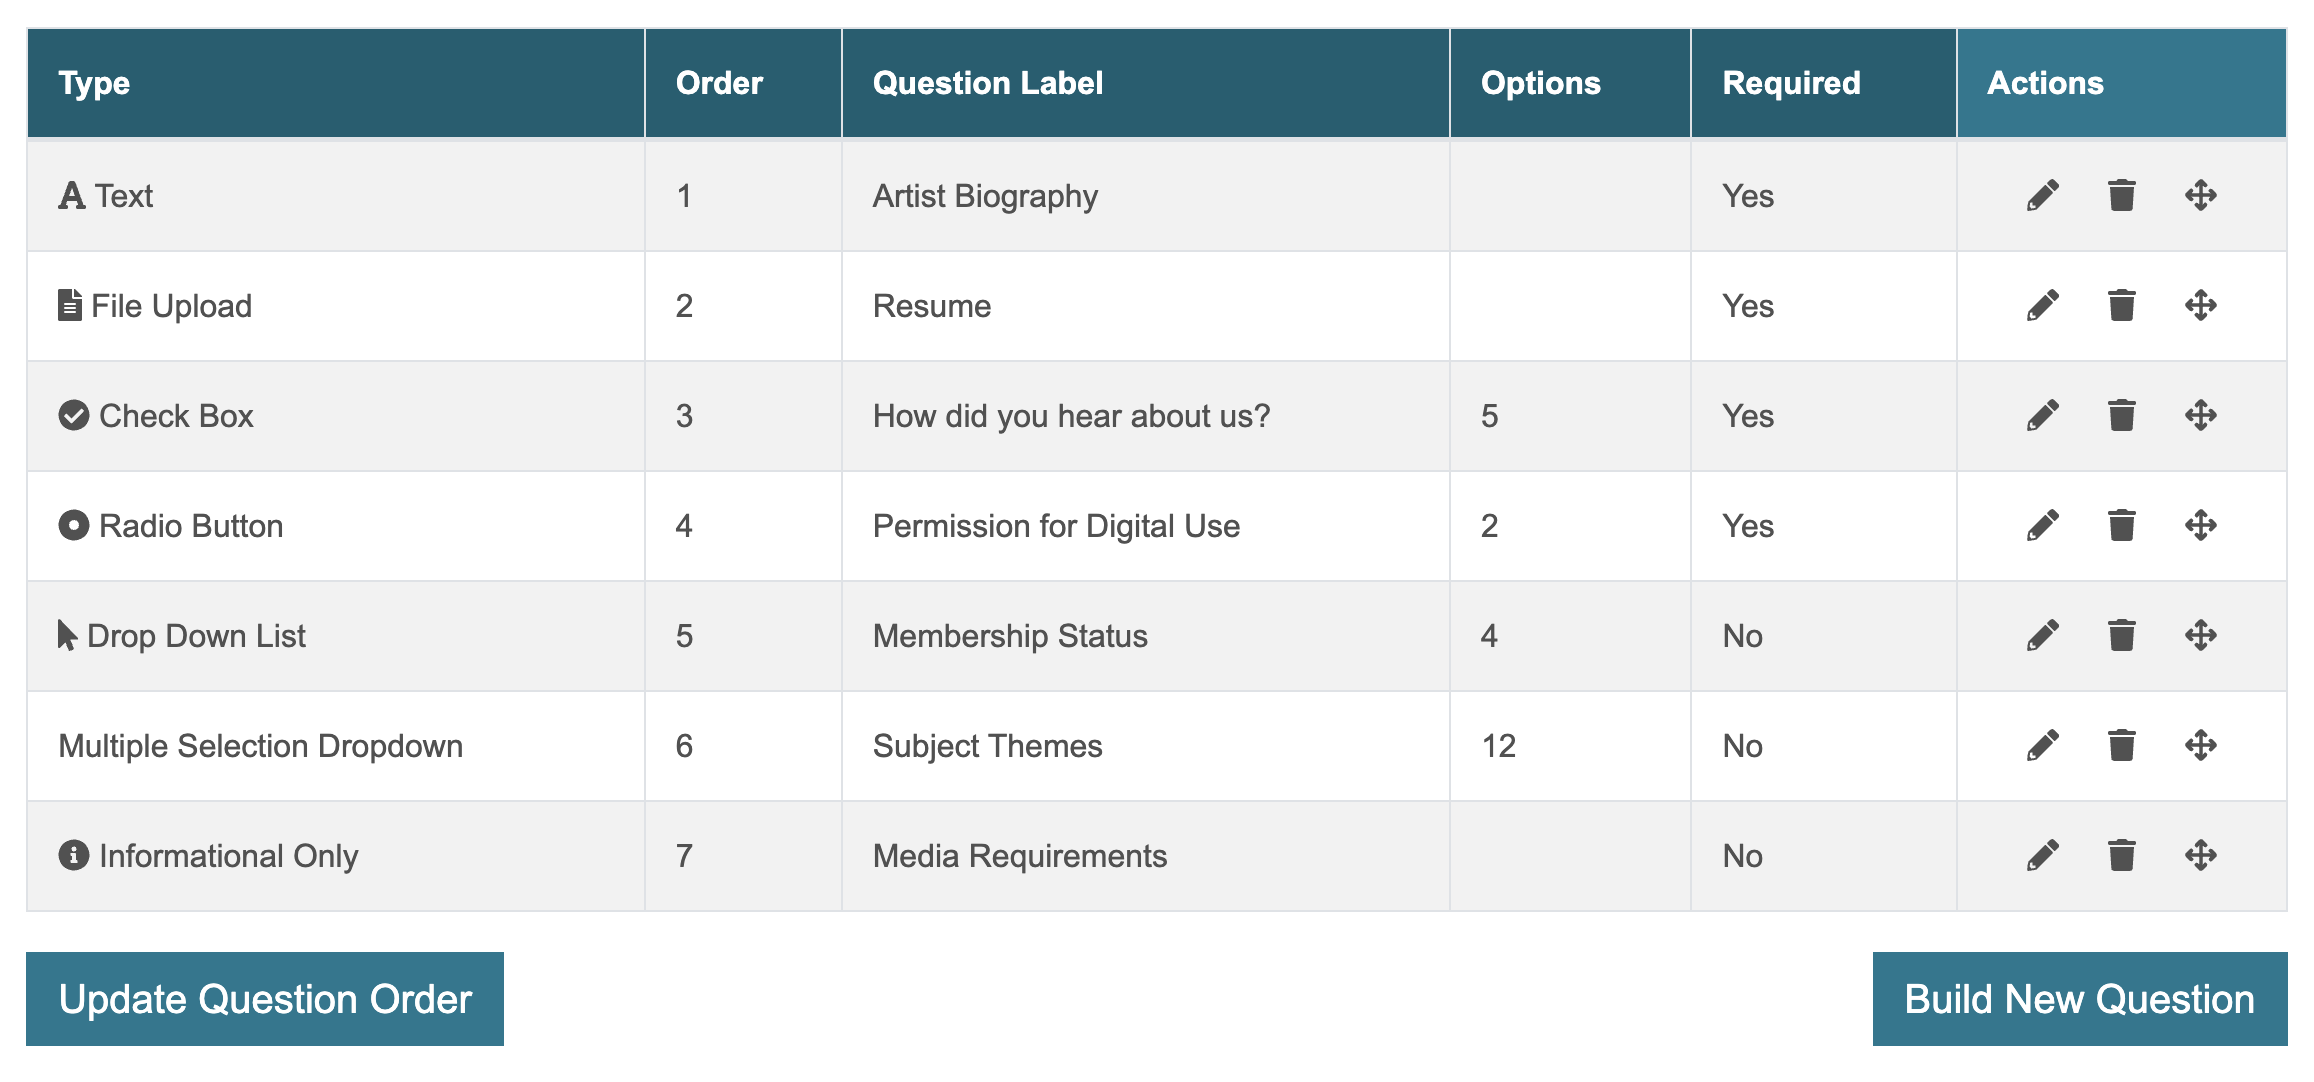
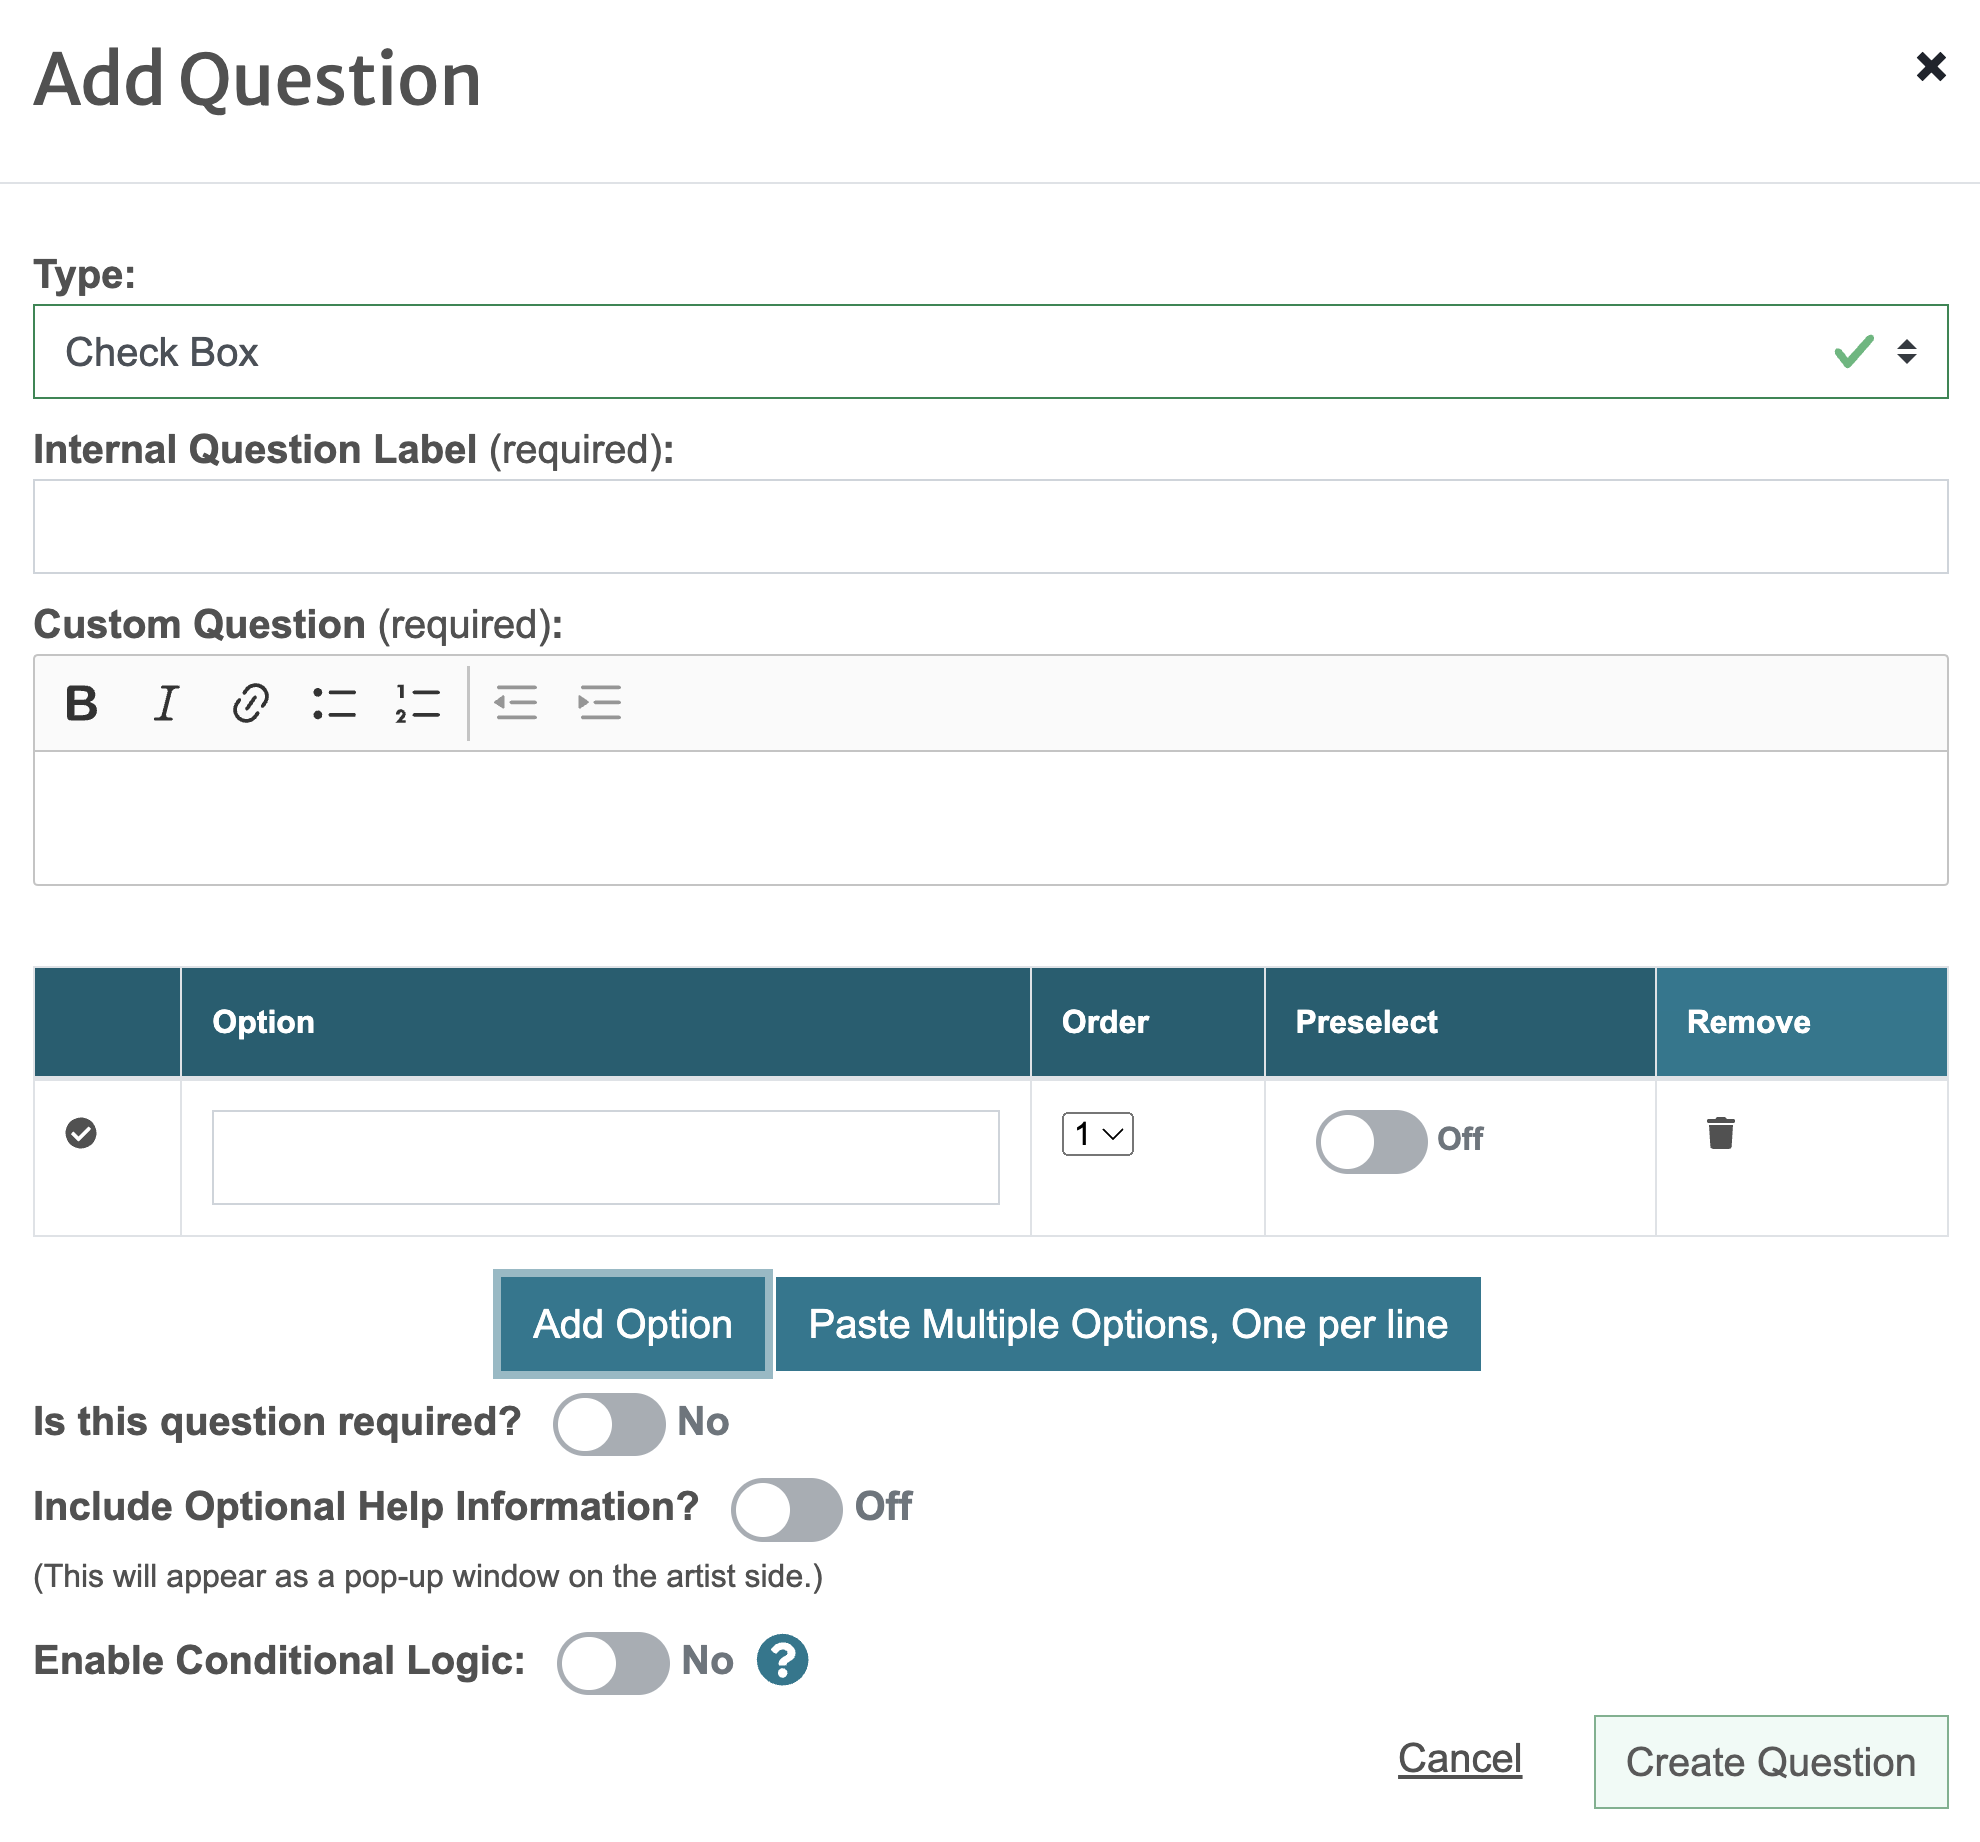
5. Build the Custom Form Questions that applicants will complete.
Click Build New Question and choose a question type from the drop-down menu. You can create an unlimited number of application form questions.
Click the arrow to the left of each question type to view the definition.
Text
Applicants type their answers in a text box.
File Upload
Applicants upload a file of 2MB or less. (Accepted file types: File can not exceed 2 MB and must be .txt, .pdf, .doc, .docx, .xls, or .jpg format).
Check Box
Applicants select one or more answers from a list.
Radio Button
Applicants select only one answer to a question. This is good for yes/no questions.
Drop Down List
Applicants select one answer from several possible answers.
Multiple Selection Dropdown
Applicants select one or more answers from a dropdown list. Particularly useful for questions with a long list of answer options.
Informational Only
Instructional, read-only text that does not require an answer.
Once you select your question type, fill out the required fields applicable to the question type.
Click the arrow to the left of each field to see more information.
Internal Title
This is the question title. The applicants will not see it.
Maximum Character Limit
Set a character limit (including spaces) for the applicant’s answer. Only available for text-type questions.
Custom Question
This is where you enter your question that will display to applicants.
Options
Only available for multiple select question types.
To add answer options individually, click Add Option and enter the first option in the blank field. Repeat the process for as many answer options as you need.
To add answer options in bulk, click Paste Multiple Options, One per line, and paste your list of answer options into the text box that appears. Ensure each option is separated by a line break. Click Create Options to generate the answer options.
Is this question required?
Toggle to Yes to make the question required for all applicants.
Include Optional Help Information?
Toggle to On and enter additional instructions for applicants in the text box. This will appear on the application as a help bubble.
Enable Conditional Logic
Toggle to On to enable conditional logic and set up the conditions for this question. Learn more about building conditional logic questions below.
⚡TIP: CaFÉ automatically collects artists’ contact information (name, email address, etc.) and artwork details (title, medium, dimensions, etc.) so you do not need to create questions to collect this information.
Once you fill out the applicable fields, click Create Question.
To edit an existing question, click the pencil icon ✏️ .
To remove a question, click the trash icon 🗑️.
To reorder the custom form questions, click on a question from the table and drag it to the desired location in the list. Click Update Question Order.
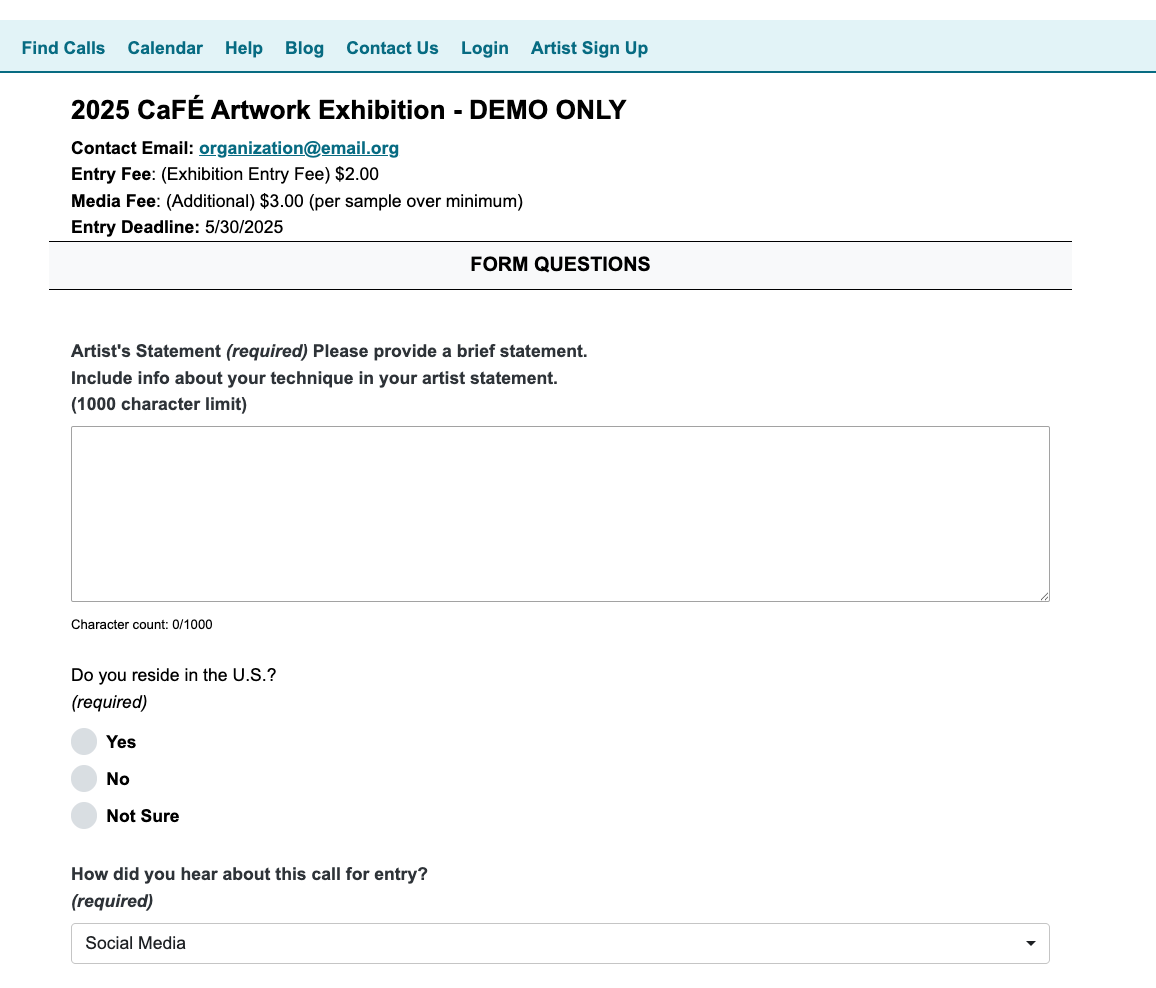
Click Preview Call to see exactly what applicants will see and confirm that your custom questions are set up properly.
⚡TIP: Learn additional information and tips for setting up your application by watching our Build a Better Application webinar!
Building Questions with Conditional Logic
Conditional logic allows you to create questions that display or hide based on an applicant’s response to another question.
How to Build a Question with Conditional Logic:
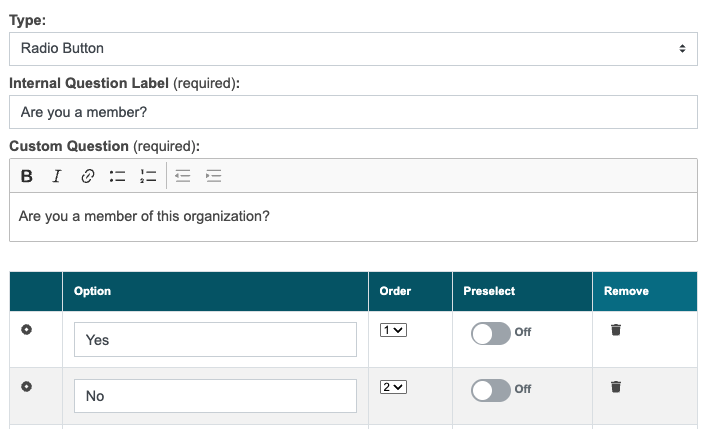
Create the initial question.
Ex: Are you a member? (Yes, I am a member/No, I am not a member)
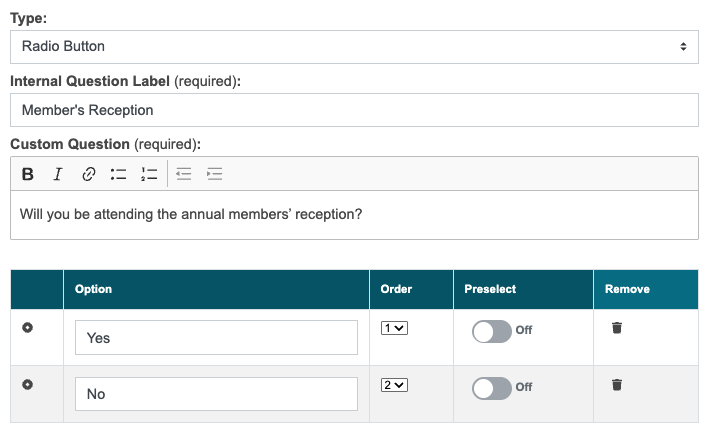
Create a new question that will be based on the applicant’s answer to the previous question.
Ex: Will you be attending the annual members’ reception? (Yes/No)
On this new question, set the Enable Conditional Logic setting to On.

Choose from the options below to determine how the conditional logic will work. Click the arrow to the left of each option to view the definition.
Show/Hide
This field determines how and when the question will appear on the application form.
Select Show if you want your question to not display on the application form until the criteria has been met.
Select Hide if you want your question to display on the application form unless the criteria has been met.
Any/All
This field determines how the criteria must be met so the question appears on the application form.
Select Any so that the question shows/hides if at least one of the rules created in the next step is met.
Select All so that the question only shows/hides if all rules created are met.
Click Add New Rule and create the rule that must be met to show/hide this question. Click the arrow to the left of each setting to view the definition.
Select a Question
Select the question applicants will answer first. (e.g., Are you a member?)
Contains/Is/Is Not
Select whether the answer given by the applicant that will trigger the new question is, is not, or contains the answer you choose in the next step. Important: If you’re creating a question that is triggered by two answers to the previous question, choose the contain option.
Select an Answer
Select the answer that the rule is assigned to. (e.g., Yes, I am a member.)
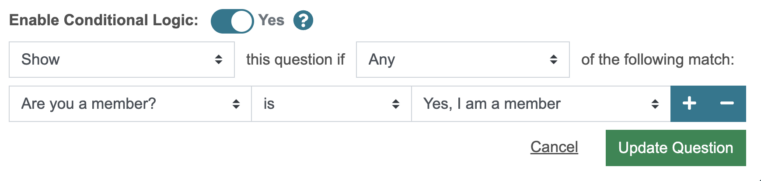
📌 In our example, the rule should be as follows:
[Show] this question if [Any] of the following match:
[Are you a member?] [is] [Yes, I am a member].
Click add ➕ to add a rule. Click subtract ➖ to remove a rule.
Once your question is built and the conditional logic rules are set up, click Create Question.
Click Preview Call to review the application as it will appear to the artist. You can test your conditional logic question by answering the first question to meet the criteria and ensuring the additional question shows/hides as intended.
⚡TIP: Test your conditional logic question by answering the initial question and ensuring the additional question shows/hides as intended.